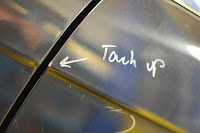
And now for this week's installment, we would like to introduce Black Beauty, who is in need of a little TLC. Our clients, a father and son team, own this week's blog subject - 1990 325ix in Diamond Schwarz Metallic. This all wheel drive black beauty was in need of a few paint touch ups. A few scratches and chips is about all that keeps this four-wheeled stallion from stampeding down the way in a blur. We will address the following areas: the driver's side door and fender, the passenger's side door and fender, and the edge of the bonnet. There were a few other small areas that needed attention, so we took care of those as well while we were at it.
(Driver's side fender and door)
(Passenger's side and bonnet)
Using some 400-grit sandpaper and a bottle of water and a little dish soap, we remove any old touch up paint in these areas. This also gives the paint a little "tooth" so the new paint will stick. We must be very careful so as not to get down to bare metal.
Unfortunately, we ran into this very situation along the edge of the bonnet, but fear not! All we have to do is spray on some self-etching primer before applying the base coat. We used SEM self-etching primer after masking off all areas to be primed. The tape protects the rest of the car from any overspray. A little lacquer thinner was applied to further clean the areas before applying the touch up paint.


Quick, light, even coats of primer are applied to all of Black Beauty's spots. (By the way, we named the car for purposes of this blog, just for fun. You might agree when you see this paint! And maybe this name will stick.) Once the primer was applied to our satisfaction and allowed to dry thoroughly, we used 600-grit sandpaper and water to blend the area. We started with 1500-grit, but decided the 600-grit was the way to go. It was a little more aggressive, and did not cut into the paint too much. Again, we had to be careful not to blend the primer down too far, or you run the risk of starting the whole process over!
We mixed up our base coat after assembling the airbrush. We mixed the paint 50-50 with reducer. It's important to read all instructions carefully so you know exactly how to find your paint to reducer ratio. We admit that we actually mixed a little (ok, a lot!) more than we needed for this project, but that's beside the point. We didn't have a proper stir stick, such as a popsicle stick, but the gasket scraper we found worked like a charm! Next, we filter the concoction into the jar, and we're ready to spray!
The basecoat dries flat, and once we get the clearcoat applied, the sheen will be back to match the rest of the car.
Safety Note: It is imperative to wear a proper respirator when painting. And, again, read all instructions on the cans of paint, reducer, and hardener carefully. Our project called for us to mix 2 parts clear coat to 1 part hardener. After mixing way more than we needed (again!), we filtered it into another jar, and set off to spray.
Stay tuned for the final showing of Black Beauty.


No comments:
Post a Comment
Thank you for visiting Reggie's Motorworks Blog! Please leave a comment.